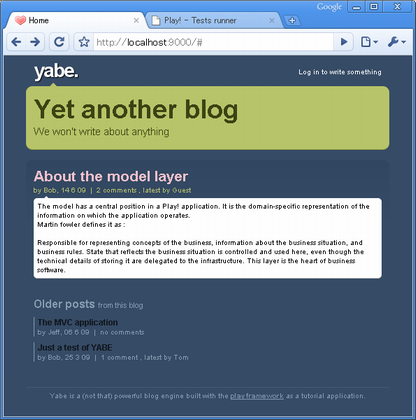
showアクションの追加
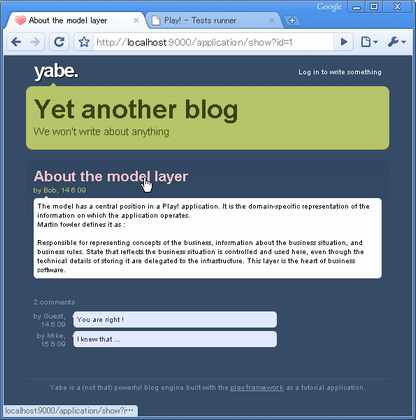
ブログへのPost内容を表示するshowアクションを作成。/app/controllers/Application.java に以下を追加。
    public static void show(Long id) {
        Post post = Post.findById(id);
        render(post);
    }
上記アクション用のテンプレート /app/views/Application/show.html を作成
#{extends 'main.html' /}
#{set title:post.title /}

#{display post:post, as:'full' /}
/app/views/tags/display.html に showテンプレートへのリンクを追加。
 *{ Display a post in one of these modes: 'full', 'home' or 'teaser' }*

<div class="post ${_as == 'teaser' ? 'teaser' : ''}">
    <h2 class="post-title">
        <a href="@{Application.show(_post.id)}">${_post.title}</a>
    </h2>
    ・・・
トップページへの戻る遷移の追加のため、/app/views/main.html にタイトル押下時のリンク先を修正。
  <div id="title">
    <span class="about">About this blog</span>
    <h1><a href="@{Application.index()}">${blogTitle}</a></h1>
    <h2>${blogBaseline}</h2>
  </div>
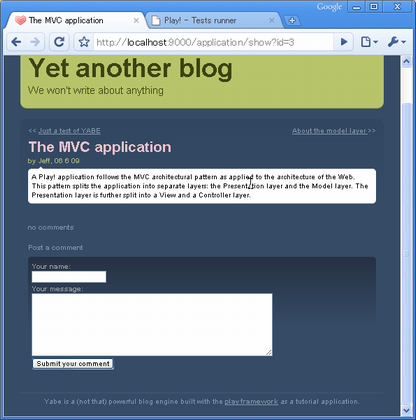
詳細画面から次のPostへの遷移
Postの詳細画面から直接次のPost詳細画面へ遷移できるようにする。app/models/Post.java に1つ前と1つ後ろのPostの取得メソッドを追加。
    public Post previous() {
        return Post.find("postedAt < ? order by postedAt desc", postedAt).first();
    }

    public Post next() {
        return Post.find("postedAt > ? order by postedAt asc", postedAt).first();
    }
/app/views/Application/show.html にリンク追加。
#{extends 'main.html' /}
#{set title:post.title /}

<ul id="pagination">
    #{if post.previous()}
        <li id="previous">
            <a href="@{Application.show(post.previous().id)}">
                ${post.previous().title}
            </a>
        </li>
    #{/if}
    #{if post.next()}
        <li id="next">
            <a href="@{Application.show(post.next().id)}">
                ${post.next().title}
            </a>
        </li>
    #{/if}
</ul>

#{display post:post, as:'full' /}
コメント追加処理の追加
コメントの追加処理を app/controllers/Application.java に追加。
public static void postComment(Long postId, String author, String content) {
    Post post = Post.findById(postId);
    post.addComment(author, content);
    show(postId);
}
コメント追加用のフォームを /app/views/Application/show.html の#{display}タグの下に追加。
<h3>Post a comment</h3>

#{form @Application.postComment(post.id)}
    <p>
        <label for="author">Your name: </label>
        <input type="text" name="author" id="author" />
    </p>
    <p>
        <label for="content">Your message: </label>
        <textarea name="content" id="content"></textarea>
    </p>
    <p>
        <input type="submit" value="Submit your comment" />
    </p>
#{/form}
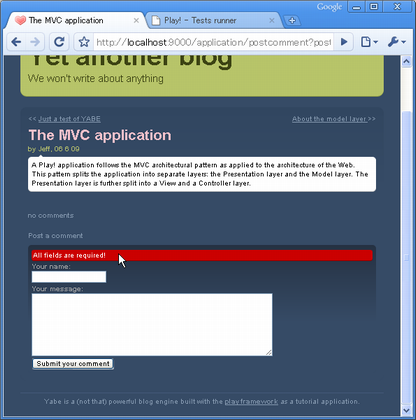
バリデーションの追加
コメント登録時のバリデーションを追加する。app/controllers/Application.java の postComment を以下に修正する。@Required アノテーションにより必須項目を定義。
    public static void postComment(Long postId, @Required String author, @Required String content) {
        Post post = Post.findById(postId);
        if (validation.hasErrors()) {
            render("Application/show.html", post);
        }
        post.addComment(author, content);
        show(postId);
    }
/app/views/Application/show.html にエラーメッセージの表示を追加。
<h3>Post a comment</h3>
#{form @Application.postComment(post.id)}
    #{ifErrors}
        <p class="error">
            All fields are required!
        </p>
    #{/ifErrors}
    ・・・
#{/form}
コメント追加後のメッセージ表示
コメント追加後にメッセージを表示するよう、app/controllers/Application.java の postComment に flash.success を追加。
public static void postComment(Long postId, @Required String author, @Required String content) {
    Post post = Post.findById(postId);
    if(validation.hasErrors()) {
        render("Application/show.html", post);
    }
    post.addComment(author, content);
    flash.success("Thanks for posting %s", author);
    show(postId);
}
/app/views/Application/show.html flash.success のタグを追加。
...
#{if flash.success}
    <p class="success">${flash.success}</p>
#{/if}

#{display post:post, as:'full' /}
...


