Play framework とは
RoR風のフルスタックフレームワークです。Java5以上。ダウンロードは以下から。
http://www.playframework.org/
今回は play-1.0.1.zip をダウンロード。解凍したディレクトリ内で play を起動してみる。Usageが表示される。
play-1.0.1> play
~        _            _
~  _ __ | | __ _ _  _| |
~ | '_ \| |/ _' | || |_|
~ |  __/|_|\____|\__ (_)
~ |_|            |__/
~
~ play! 1.0.1, http://www.playframework.org
~
~ Usage: play cmd [app_path] [--options]
~
~ with,  new      Create a new application
~        run      Run the application in the current shell
~        help     Show play help
~
新しいアプリケーションの作成
以下のコマンドで新しいアプリケーションを作成。
play-1.0.1> play new myApp
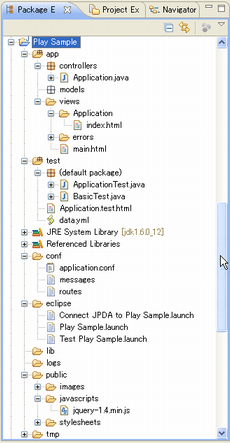
myApp というディレクトリが作成され、アプリケーションの準備が整う。
run コマンドで作成したアプリケーションの実行。
play-1.0.1>play run myApp
ブラウザから9000ポートでアクセス可能。
http://localhost:9000
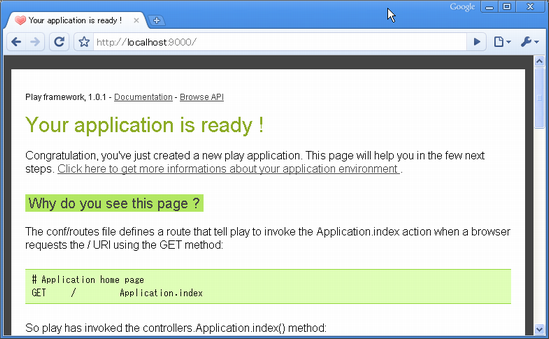
終了時はコマンドプロンプトで Ctrl+C
URLマッピング
Playでは conf/routes ファイルでURLとコントローラクラスとのマッピングを定義。作成直後のroutesファイルは以下の定義。
GET     /                        Application.index
GET     /public/                 staticDir:public
*       /{controller}/{action}   {controller}.{action}
/へのGETアクセスは Application クラスのindexメソッド(アクションメソッド)にマッピングされている。Application クラスは以下。
import play.mvc.*;

public class Application extends Controller {
    public static void index() {
        render();
    }
}
viewテンプレート
Application の index アクションメソッドにより /app/views/Application/index.html が View テンプレートとして呼ばれる。
#{extends 'main.html' /}
#{set title:'Home' /}

#{welcome /}
Playタグにより非常にシンプルな構造。#{extends /} タグにて別のテンプレート(ここではmain.html)を拡張する。index.html テンプレートの親テンプレートとなるのが /app/views/main.html で以下。
<!DOCTYPE html>

<html>
  <head>
    <title>#{get 'title' /}</title>
    <meta http-equiv="Content-Type" content="text/html; charset=utf-8">
    <link rel="stylesheet" type="text/css" media="screen" href="@{'/public/stylesheets/main.css'}">
    #{get 'moreStyles' /}
    <link rel="shortcut icon" type="image/png" href="@{'/public/images/favicon.png'}">
    <script src="@{'/public/javascripts/jquery-1.4.min.js'}" type="text/javascript" charset="utf-8"></script>
    #{get 'moreScripts' /}
  </head>
  <body>
    #{doLayout /}
  </body>
</html>
上記 #{doLayout /} タグにて index.html の内容が body 内に埋め込まれる。
Hello Worldの作成
/app/views/Application/index.html テンプレートを以下のように編集
#{extends 'main.html' /}
#{set title:'Home' /}

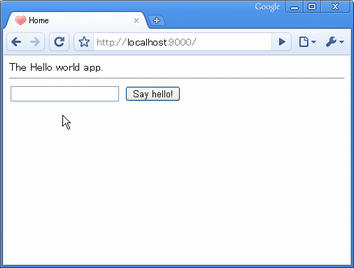
<form action="@{Application.sayHello()}" method="GET">
  <input type="text" name="myName" />
  <input type="submit" value="Say hello!" />
</form>
@{...} ノーテーションにて Application.sayHello() アクションメソッドと紐付け。
Application クラスに sayHello アクションメソッドを追加。
public class Application extends Controller {
    ・・・
    public static void sayHello(String myName) {
        render(myName);
    }
}
sayHelloに対応するsayHelloテンプレートを作成 /app/views/Application/sayHello.html
#{extends 'main.html' /}
#{set title:'Home' /}

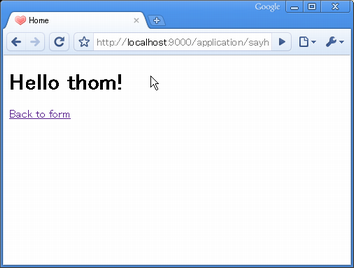
<h1>Hello ${myName ?: 'guest'}!</h1>

<a href="@{Application.index()}">Back to form</a>
以下のコマンドにて動作確認
play-1.0.1>play run myApp
レイアウトのカスタマイズ
/app/views/main.html の body タグを以下に変更。
  <body>
    The Hello world app.
    <hr/>

    #{doLayout /}
  </body>
共通的にレイアウトが適用される。
validation の追加
sayHello アクションメソッドを以下に変更。
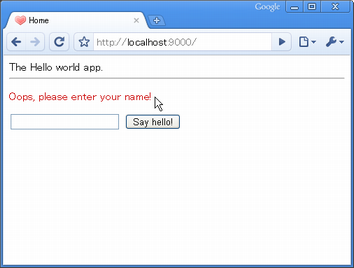
public static void sayHello(@Required String myName) {
    if(validation.hasErrors()) {
        flash.error("Oops, please enter your name!");
        index();
    }
    render(myName);
}
@Required アノテーションにより必須定義。
/app/views/Application/index.html のformタグの上にエラーメッセージの表示を追加。
#{if flash.error}
  <p style="color:#c00">
    ${flash.error}
  </p>
#{/if}
テストスイートの作成
アプリケーションをテストモードで起動。
play test myApp
http://localhost:9000/@tests でアクセス
select allを選択し、Start!で表示されているテストが実行される。unitテストと機能テストとSeleniumテストが行われる。
BasicTestはデフォルトでは以下の実装。必要なテストに変更する。
public class BasicTest extends UnitTest {
    @Test
    public void aVeryImportantThingToTest() {
        assertEquals(2, 1 + 1);
    }
}
同じように ApplicationTest は以下の実装となっている。Playが提供するテスト系にユーティリティにてテストの記述が簡素に可能。
public class ApplicationTest extends FunctionalTest {
    @Test
    public void testThatIndexPageWorks() {
        Response response = GET("/");
        assertIsOk(response);
        assertContentType("text/html", response);
        assertCharset("utf-8", response);
    }
}
selenium テスト
/test/Application.test.html にてデフォルト実装がある。
*{ You can use plain selenium command using the selenium tag }*

#{selenium}
    // Open the home page, and check that no error occured
    open('/')
    waitForPageToLoad(1000)
    assertNotTitle('Application error')
#{/selenium}
以下に変更してValidation処理の検証を行う。
#{selenium}
    // Open the home page, and check that no error occurred
    open('/')
    assertNotTitle('Application error')

    // Check that it is the form
    assertTextPresent('The Hello world app.')

    // Submit the form
    clickAndWait('css=input[type=submit]')

    // Check the error
    assertTextPresent('Oops, please enter your name!')

    // Type the name and submit
    type('css=input[type=text]', 'bob')
    clickAndWait('css=input[type=submit]')

    // Check the result
    assertTextPresent('Hello bob!')
    assertTextPresent('The Hello world app.')

    // Check the back link
    clickAndWait('link=Back to form')

    // Home page ?
    assertTextNotPresent('Hello bob!')
#{/selenium}再びテスト実施にて上記のSeleniumテストが実施される。
