Spin とは
2023年03月に 1.0 版がリリースされた WebAssembly でマイクロサービスアプリケーションを作るためのフレームワークです。
フレームワークとなっていますが、WIT(Wasm Interface Type) を生成し、WebAssembly Component Model として動作させるためのライブラリと、それを実行するツール群を合わせたもの といった感じになっています。
リポジトリは以下です。
sdk ディレクトリに、WIT 関連のマクロと、spin_sdk::http::Request などの HTTP や Redis メッセージ用のライブラリがあります。
src ディレクトリに、spin コマンドの実装が入っており、spin/crates に色々なモジュールがあります。全体としてソースも少量で小さなプロジェクトになっています。
WebAssembly を生成して実行するので、Rust や Go、また AssemblyScript, C/C++, C# and .NET Languages, Grain, Python, Ruby, Zig などでもアプリケーションコードを書くことができるというのが特徴になるのでしょう。
作成したアプリケーションは、コマンド一つで Fermyon Cloud 上に簡単にデプロイできるようです。
Spin の導入(macOS / Linux)
Spin は単一の実行ファイルになっているので、インストールするというよりかは、ダウンロードして配備するだけで住みます。とはいえ一応インストールスクリプトが提供されています。
$ curl -fsSL https://developer.fermyon.com/downloads/install.sh | bash
以下のように実行されます。
Step 1: Downloading: https://github.com/fermyon/spin/releases/download/v1.0.0/spin-v1.0.0-macos-amd64.tar.gz
Done...

Step 2: Decompressing: spin-v1.0.0-macos-amd64.tar.gz
x crt.pem
x spin.sig
x README.md
x LICENSE
x spin
spin 1.0.0 (df99be2 2023-03-21)
Done...

Step 3: Removing the downloaded tarball
Done...

You're good to go. Check here for the next steps: https://developer.fermyon.com/spin/quickstart
Run './spin' to get started
現在ディレクトリに spin の実行ファイルが配備されます。
drwxr-xr-x   7 xxx  staff       224  3 30 21:30 .
drwxr-xr-x  89 xxx  staff      2848  3 30 21:29 ..
-rw-r--r--   1 xxx  staff     11602  3 22 03:16 LICENSE
-rw-r--r--   1 xxx  staff      2574  3 22 03:16 README.md
-rw-------   1 xxx  staff      1720  3 22 03:16 crt.pem
-rwxr-xr-x   1 xxx  staff  41109152  3 22 03:16 spin
-rw-------   1 xxx  staff        96  3 22 03:16 spin.sig
必要に応じて、パスの通ったディレクトリに spin を配備するか、パスを通しておきましょう。
Spin の導入(Windows)
Windows 用のアーカイブをダウンロードして解凍するだけです。 PowerShell だと以下のようになります。
PS> mkdir spin
PS> cd spin

PS> curl https://github.com/fermyon/spin/releases/download/v1.0.0/spin-v1.0.0-windows-amd64.zip -OutFile spin.zip
PS> Expand-Archive -Path spin.zip -DestinationPath "./"

PS> ls
    ディレクトリ: C:\XXX\spin

Mode                 LastWriteTime         Length Name
----                 -------------         ------ ----
-a----        2023/03/21     18:23           1716 crt.pem
-a----        2023/03/21     18:23          11819 LICENSE
-a----        2023/03/21     18:23           2631 README.md
-a----        2023/03/21     18:23       33454080 spin.exe
-a----        2023/03/21     18:23             96 spin.sig
ヘルプの確認
ヘルプは以下のようになります。
$ ./spin --help
spin 1.0.0 (df99be2 2023-03-21)
The Spin CLI

USAGE:
    spin <SUBCOMMAND>

OPTIONS:
    -h, --help       Print help information
    -V, --version    Print version information

SUBCOMMANDS:
    add          Scaffold a new component into an existing application
    build        Build the Spin application
    cloud        Commands for publishing applications to the Fermyon Platform
    deploy       Package and upload an application to the Fermyon Platform
    help         Print this message or the help of the given subcommand(s)
    login        Log into the Fermyon Platform
    new          Scaffold a new application based on a template
    plugins      Install/uninstall Spin plugins
    registry     Commands for working with OCI registries to distribute applications
    templates    Commands for working with WebAssembly component templates
    up           Start the Spin application
spin new でプロジェクト作成して、spin build で WebAssembly にビルドして、spin up でローカルで実行。spin registry push でコンテナレジストリにプッシュ。 といった流れになります。
アプリケーションの作成
アプリケーションは spin new コマンドで作成します。
初回起動時には、アプリケーションのひな形のテンプレートが自動でダウンロードされます。
$ ./spin new
You don't have any templates yet. Would you like to install the default set? yes
Copying remote template source
Installing template http-c...
Installing template http-empty...
Installing template http-go...
Installing template http-grain...
Installing template http-php...
Installing template http-rust...
Installing template http-swift...
Installing template http-zig...
Installing template redirect...
Installing template redis-go...
Installing template redis-rust...
Installing template static-fileserver...
Installed 12 template(s)
テンプレートは、macOS の場合 /Users/xxx/Library/Application Support/spin/templates、Linux の場合 /home/xxx/.local/share/spin/templates
Windows の場合 C:\Users\xxx\AppData\Local\spin\templates に保存されます。
( dirs クレートの dirs::data_local_dir() 以下に保存される という意味です )
テンプレートのダウンロードが完了後、テンプレートを選択します。
+------------------------------------------------------------------------+
| Name                Description                                        |
+========================================================================+
| http-c              HTTP request handler using C and the Zig toolchain |
| http-empty          HTTP application with no components                |
| http-go             HTTP request handler using (Tiny)Go                |
| http-grain          HTTP request handler using Grain                   |
| http-php            HTTP request handler using PHP                     |
| http-rust           HTTP request handler using Rust                    |
| http-swift          HTTP request handler using SwiftWasm               |
| http-zig            HTTP request handler using Zig                     |
| redirect            Redirects a HTTP route                             |
| redis-go            Redis message handler using (Tiny)Go               |
| redis-rust          Redis message handler using Rust                   |
| static-fileserver   Serves static files from an asset directory        |
+------------------------------------------------------------------------+
Pick a template to start your application with:
  http-c (HTTP request handler using C and the Zig toolchain)
  http-empty (HTTP application with no components)
  http-go (HTTP request handler using (Tiny)Go)
  http-grain (HTTP request handler using Grain)
  http-php (HTTP request handler using PHP)
> http-rust (HTTP request handler using Rust)
  http-swift (HTTP request handler using SwiftWasm)
  http-zig (HTTP request handler using Zig)
  redirect (Redirects a HTTP route)
  redis-go (Redis message handler using (Tiny)Go)
  redis-rust (Redis message handler using Rust)
  static-fileserver (Serves static files from an asset directory)
ここでは http-rust (HTTP request handler using Rust) を選択しました。
以下のようにアプリケーション名を入力などを行い、Scaffold 完成です。
Pick a template to start your application with: http-rust (HTTP request handler using Rust)
Enter a name for your new application: hello_spin
Description:
HTTP base: /
HTTP path: /...
以下のようなファイルが作成されます。
$ tree -a hello_rust
hello_rust
├── .gitignore
├── Cargo.toml
├── spin.toml
└── src
    └── lib.rs
アプリケーションの実行
rust で wasm ツールチェーン未導入の場合は以下で追加しておきます。ついでに rustup もアップデートしておきましょう。
$ rustup update
$ rustup target add wasm32-wasi
wasm32-wasi 未導入の場合は以下のようなコンパイルエラーになります。
  = note: the `wasm32-wasi` target may not be installed
  = help: consider downloading the target with `rustup target add wasm32-wasi`
今はパスを通していないので、ビルドと実行は以下のようになります。
$ cd hello_rust
$ ../spin build
$ ../spin up

Logging component stdio to ".spin\\logs\\"

Serving http://127.0.0.1:3000
Available Routes:
  hello-spin: http://127.0.0.1:3000 (wildcard)
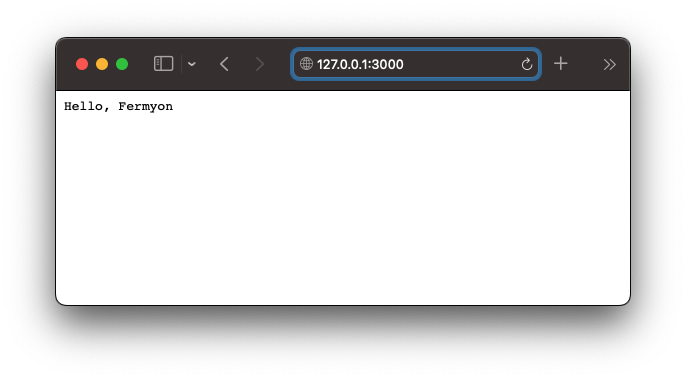
http://127.0.0.1:3000 にアクセスすれば、以下のようになります。

curl でアクセスすれば以下のようになります。
$ curl -i http://127.0.0.1:3000
HTTP/1.1 200 OK
foo: bar
content-length: 14
date: Wed, 30 Mar 2023 11:44:51 GMT

Hello, Fermyon%
アプリケーションの構成
テンプレートで作成された src/lib.rs は以下のようになっています。
use anyhow::Result;
use spin_sdk::{
    http::{Request, Response},
    http_component,
};

/// A simple Spin HTTP component.
#[http_component]
fn handle_hello_spin(req: Request) -> Result<Response> {
    println!("{:?}", req.headers());
    Ok(http::Response::builder()
        .status(200)
        .header("foo", "bar")
        .body(Some("Hello, Fermyon".into()))?)
}
#[http_component] アトリビュートを付けることでHTTPリクエストのハンドラとして機能します。
spin では #[http_component] でアトリビュートされた関数を、spin コンポーネントと呼んでいます。
Spin コンポーネントは、WIT 経由でエクスポートされた Wasm モジュールになります。
Cargo.toml は以下のようになっています。
[package]
name = "hello-spin"
authors = ["xxx"]
description = ""
version = "0.1.0"
edition = "2021"

[lib]
crate-type = [ "cdylib" ]

[dependencies]
# Useful crate to handle errors.
anyhow = "1"
# Crate to simplify working with bytes.
bytes = "1"
# General-purpose crate with common HTTP types.
http = "0.2"
# The Spin SDK.
spin-sdk = { git = "https://github.com/fermyon/spin", tag = "v1.0.0" }
# Crate that generates Rust Wasm bindings from a WebAssembly interface.
wit-bindgen-rust = { git = "https://github.com/bytecodealliance/wit-bindgen", rev = "cb871cfa1ee460b51eb1d144b175b9aab9c50aba" }

[workspace]
spin-sdk と wit-bindgen-rust クレートを使っています。
spin-sdk では、http_component や http::Request, http::Router といった部品と、#[http_component] アトリビュート用のマクロなどが提供されます。
マクロにて、 wit-bindgen-rust を使ってコンポーネントのインターフェースとなる WIT(Wasm Interface Type) を生成し、WebAssembly Component Model として動作させるという流れです(wit-bindgen-rust の実体は こちら で確認できます)。
内部では、以下のようにしてバインディングを生成しています。
wit_bindgen_rust::export!({src["spin_http"]: #HTTP_COMPONENT_WIT});
Spin はデフォルトで、spin コマンドを実行した現在のディレクトリにある spin.toml を読み、その設定に基づいて動作します。
spin.toml は以下のようになっています。
spin_manifest_version = "1"
authors = ["xxx"]
description = ""
name = "hello_spin"
trigger = { type = "http", base = "/" }
version = "0.1.0"

[[component]]
id = "hello-spin"
source = "target/wasm32-wasi/release/hello_spin.wasm"
allowed_http_hosts = []
[component.trigger]
route = "/..."
[component.build]
command = "cargo build --target wasm32-wasi --release"
[[component]] が spin コンポーネントの定義で、ソースとして hello_spin.wasm が指定されています。
[component.trigger] では、アプリケーションにルーティングするパス、[component.build] ではビルドコマンドが指定されています。spin build すると、このコマンドでビルドが実行されることになります。
spin up すると、ここで定義された設定に基づき、WASM ランタイム wasmtime の上で WebAssembly が実行されます。
その他サンプル
パスに応じて Router でルーティングする例。
use anyhow::Result;
use spin_sdk::{
    http_component,
    http::{Request, Response, Router, Params, },
};

/// A Spin HTTP component that internally routes requests.
#[http_component]
fn handle_route(req: Request) -> Result<Response> {
    let mut router = Router::new();
    router.get("/hello/:planet", api::hello_planet);
    router.any("/*", api::echo_wildcard);
    router.handle(req)
}

mod api {
    use super::*;
    // /hello/:planet
    pub fn hello_planet(_req: Request, params: Params) -> Result<Response> {
        let planet = params.get("planet").expect("PLANET");
        Ok(http::Response::builder()
            .status(http::StatusCode::OK)
            .body(Some(format!("{planet}").into()))?)
    }
    // /*
    pub fn echo_wildcard(_req: Request, params: Params) -> Result<Response> {
        let capture = params.wildcard().unwrap_or_default();
        Ok(http::Response::builder()
            .status(http::StatusCode::OK)
            .body(Some(format!("{capture}").into()))?)
    }
}
http_router マクロによるルーティング
use anyhow::Result;
use spin_sdk::{
    http_component,
    http_router,
    http::{ Request, Response, Params, },
};

#[http_component]
fn handle_route(req: Request) -> anyhow::Result<Response> {
    let router = http_router! {
        GET "/hello/:planet" => api::hello_planet,
        _   "/*"             => |_req, params| {
            let capture = params.wildcard().unwrap_or_default();
            Ok(http::Response::builder()
                .status(http::StatusCode::OK)
                .body(Some(format!("{capture}").into()))
                .unwrap())
        }
    };
    router.handle(req)
}

mod api {
    use super::*;
    // /hello/:planet
    pub fn hello_planet(_req: Request, params: Params) -> anyhow::Result<Response> {
        let planet = params.get("planet").expect("PLANET");
        Ok(http::Response::builder()
            .status(http::StatusCode::OK)
            .body(Some(format!("{planet}").into()))
            .unwrap())
    }
}
HTTPリクエストの発行
use anyhow::Result;
use spin_sdk::{
    http::{Request, Response},
    http_component,
};

#[http_component]
fn send_outbound(_req: Request) -> Result<Response> {
    let mut res = spin_sdk::outbound_http::send_request(
        http::Request::builder()
            .method("GET")
            .uri("https://some-random-api.ml/facts/dog")
            .body(None)?,
    )?;
    res.headers_mut()
        .insert("spin-component", "rust-outbound-http".try_into()?);
    println!("{:?}", res);
    Ok(res)
}
Redis コンポーネント
use anyhow::Result;
use bytes::Bytes;
use spin_sdk::redis_component;
use std::str::from_utf8;

/// A simple Spin Redis component.
#[redis_component]
fn on_message(message: Bytes) -> Result<()> {
    println!("{}", from_utf8(&message)?);
    Ok(())
}
Postgresql 操作
#![allow(dead_code)]
use anyhow::Result;
use spin_sdk::{
    http::{Request, Response},
    http_component,
    pg::{self, Decode},
};

// The environment variable set in `spin.toml` that points to the
// address of the Pg server that the component will write to
const DB_URL_ENV: &str = "DB_URL";

#[derive(Debug, Clone)]
struct Article {
    id: i32,
    title: String,
    content: String,
    authorname: String,
    coauthor: Option<String>,
}

impl TryFrom<&pg::Row> for Article {
    type Error = anyhow::Error;

    fn try_from(row: &pg::Row) -> Result<Self, Self::Error> {
        let id = i32::decode(&row[0])?;
        let title = String::decode(&row[1])?;
        let content = String::decode(&row[2])?;
        let authorname = String::decode(&row[3])?;
        let coauthor = Option::<String>::decode(&row[4])?;

        Ok(Self {
            id,
            title,
            content,
            authorname,
            coauthor,
        })
    }
}

#[http_component]
fn process(req: Request) -> Result<Response> {
    match req.uri().path() {
        "/read" => read(req),
        "/write" => write(req),
        "/pg_backend_pid" => pg_backend_pid(req),
        _ => Ok(http::Response::builder()
            .status(404)
            .body(Some("Not found".into()))?),
    }
}

fn read(_req: Request) -> Result<Response> {
    let address = std::env::var(DB_URL_ENV)?;

    let sql = "SELECT id, title, content, authorname, coauthor FROM articletest";
    let rowset = pg::query(&address, sql, &[])?;

    let column_summary = rowset
        .columns
        .iter()
        .map(format_col)
        .collect::<Vec<_>>()
        .join(", ");

    let mut response_lines = vec![];

    for row in rowset.rows {
        let article = Article::try_from(&row)?;

        println!("article: {:#?}", article);
        response_lines.push(format!("article: {:#?}", article));
    }

    // use it in business logic

    let response = format!(
        "Found {} article(s) as follows:\n{}\n\n(Column info: {})\n",
        response_lines.len(),
        response_lines.join("\n"),
        column_summary,
    );

    Ok(http::Response::builder()
        .status(200)
        .body(Some(response.into()))?)
}

fn write(_req: Request) -> Result<Response> {
    let address = std::env::var(DB_URL_ENV)?;

    let sql = "INSERT INTO articletest (title, content, authorname) VALUES ('aaa', 'bbb', 'ccc')";
    let nrow_executed = pg::execute(&address, sql, &[])?;

    println!("nrow_executed: {}", nrow_executed);

    let sql = "SELECT COUNT(id) FROM articletest";
    let rowset = pg::query(&address, sql, &[])?;
    let row = &rowset.rows[0];
    let count = i64::decode(&row[0])?;
    let response = format!("Count: {}\n", count);

    Ok(http::Response::builder()
        .status(200)
        .body(Some(response.into()))?)
}

fn pg_backend_pid(_req: Request) -> Result<Response> {
    let address = std::env::var(DB_URL_ENV)?;
    let sql = "SELECT pg_backend_pid()";

    let get_pid = || {
        let rowset = pg::query(&address, sql, &[])?;
        let row = &rowset.rows[0];

        i32::decode(&row[0])
    };

    assert_eq!(get_pid()?, get_pid()?);

    let response = format!("pg_backend_pid: {}\n", get_pid()?);

    Ok(http::Response::builder()
        .status(200)
        .body(Some(response.into()))?)
}

fn format_col(column: &pg::Column) -> String {
    format!("{}:{:?}", column.name, column.data_type)
}
まとめ
WebAssembly のマイクロサービスアプリケーションである Spin を簡単に触ってみました。
サーバーサイド WebAssembly は発展途上で変化も多く、WebAssembly モジュール作るのも WITバインディングなど面倒な作業が多くなりますが、spin コマンドでサクッと実行できるのは便利ですねぇ。